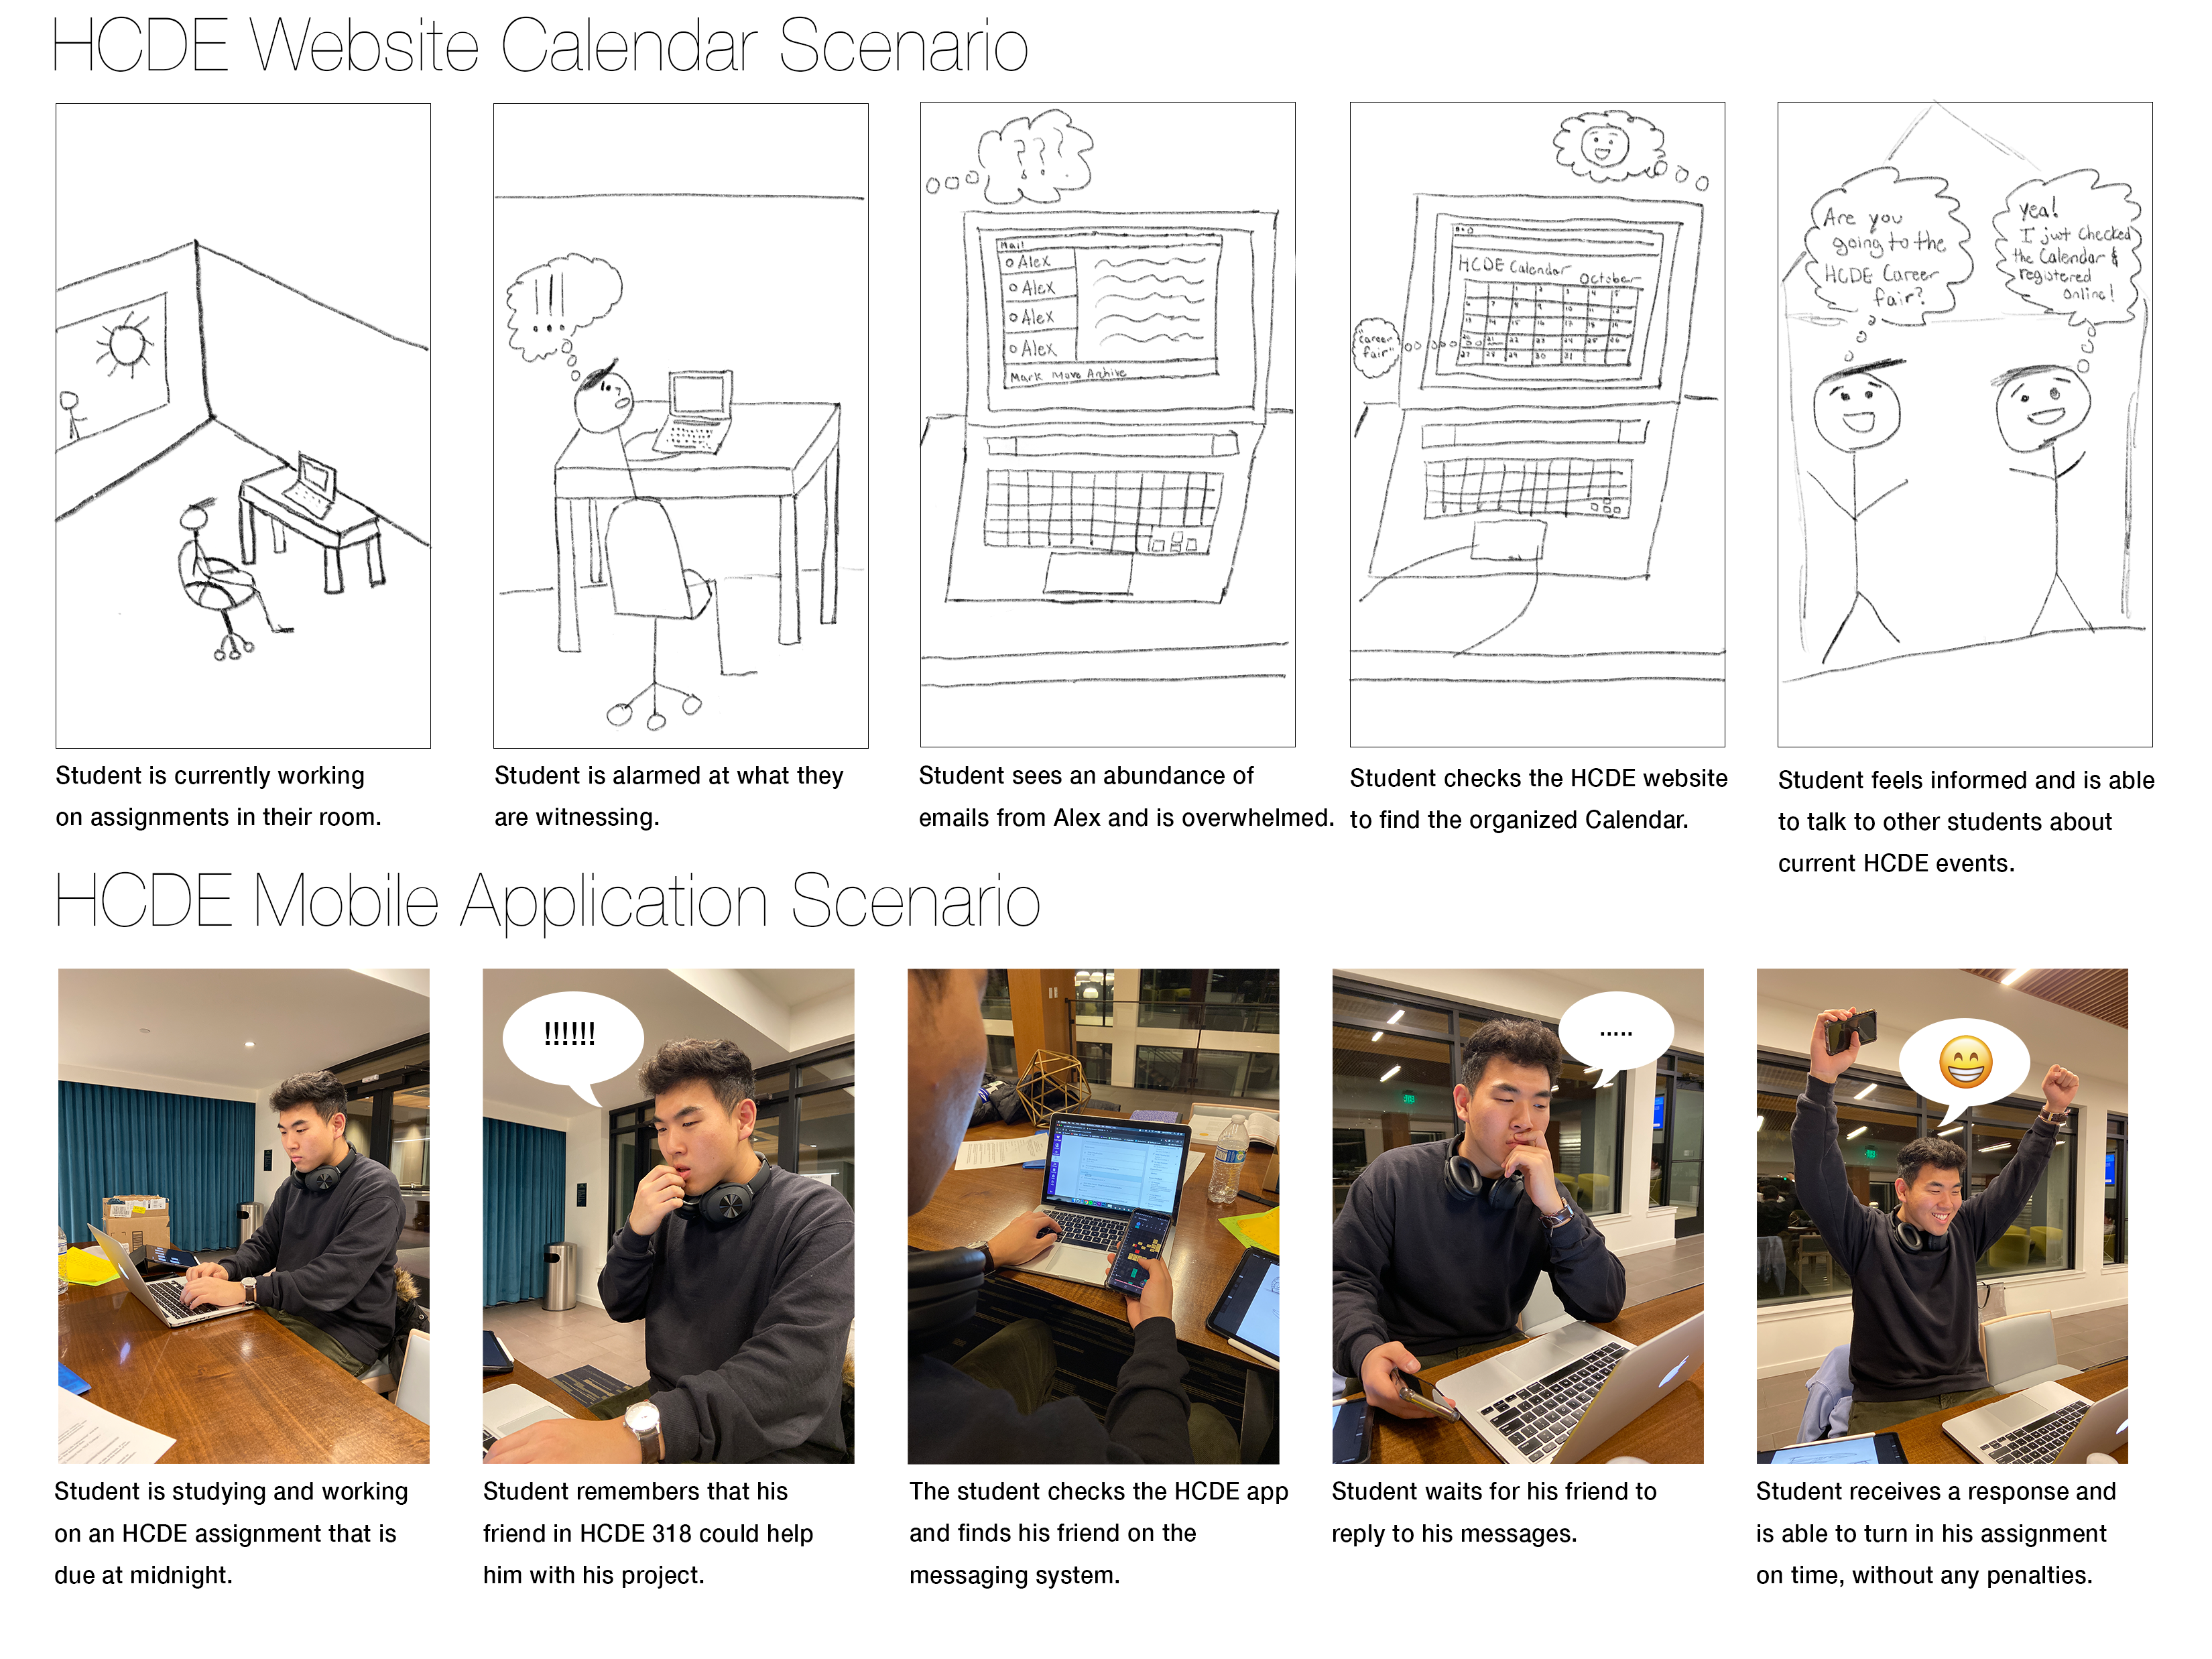
A paper prototype is a method of usability testing that is simple, concise, and is done through paper. This method is incredibly useful due to the low cost with paper and high efficiency through receiving immediate feedback. As a team, we were able to test our product with a variety of users, while taking that feedback and applying it to our prototype by sketching it in. There was no extra coding or digital designing, but just simplicity through physical paper.
We took our interface designs that varied from mobile applications, email redesigns, event boards, and hover features to apply them to our paper prototype. After re-evaluating, we moved forward with the HCDE Widget.
After designing and finalizing our paper prototype, we will take it for testing among HCDE students to utilize. We will receive feedback to further help our projects end goals.
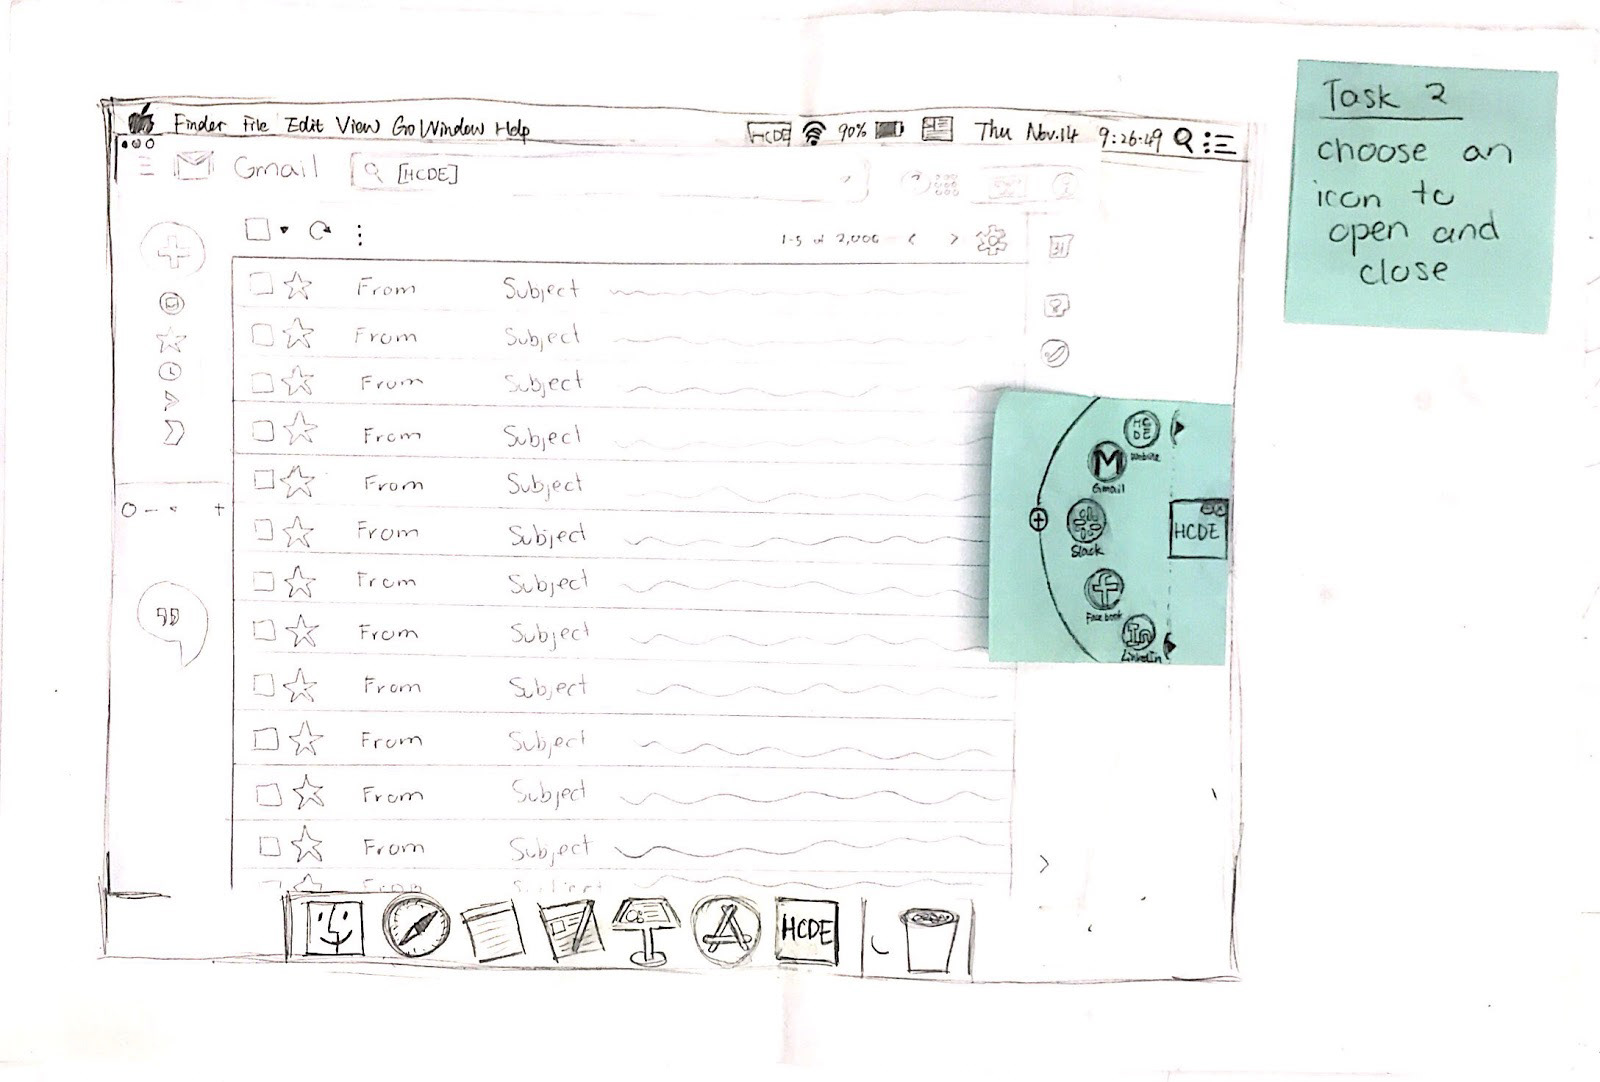
Task 1 Walkthrough: Open HCDE Plug-In
Goal: To check if the plug in is quick, simple, and easy to find.
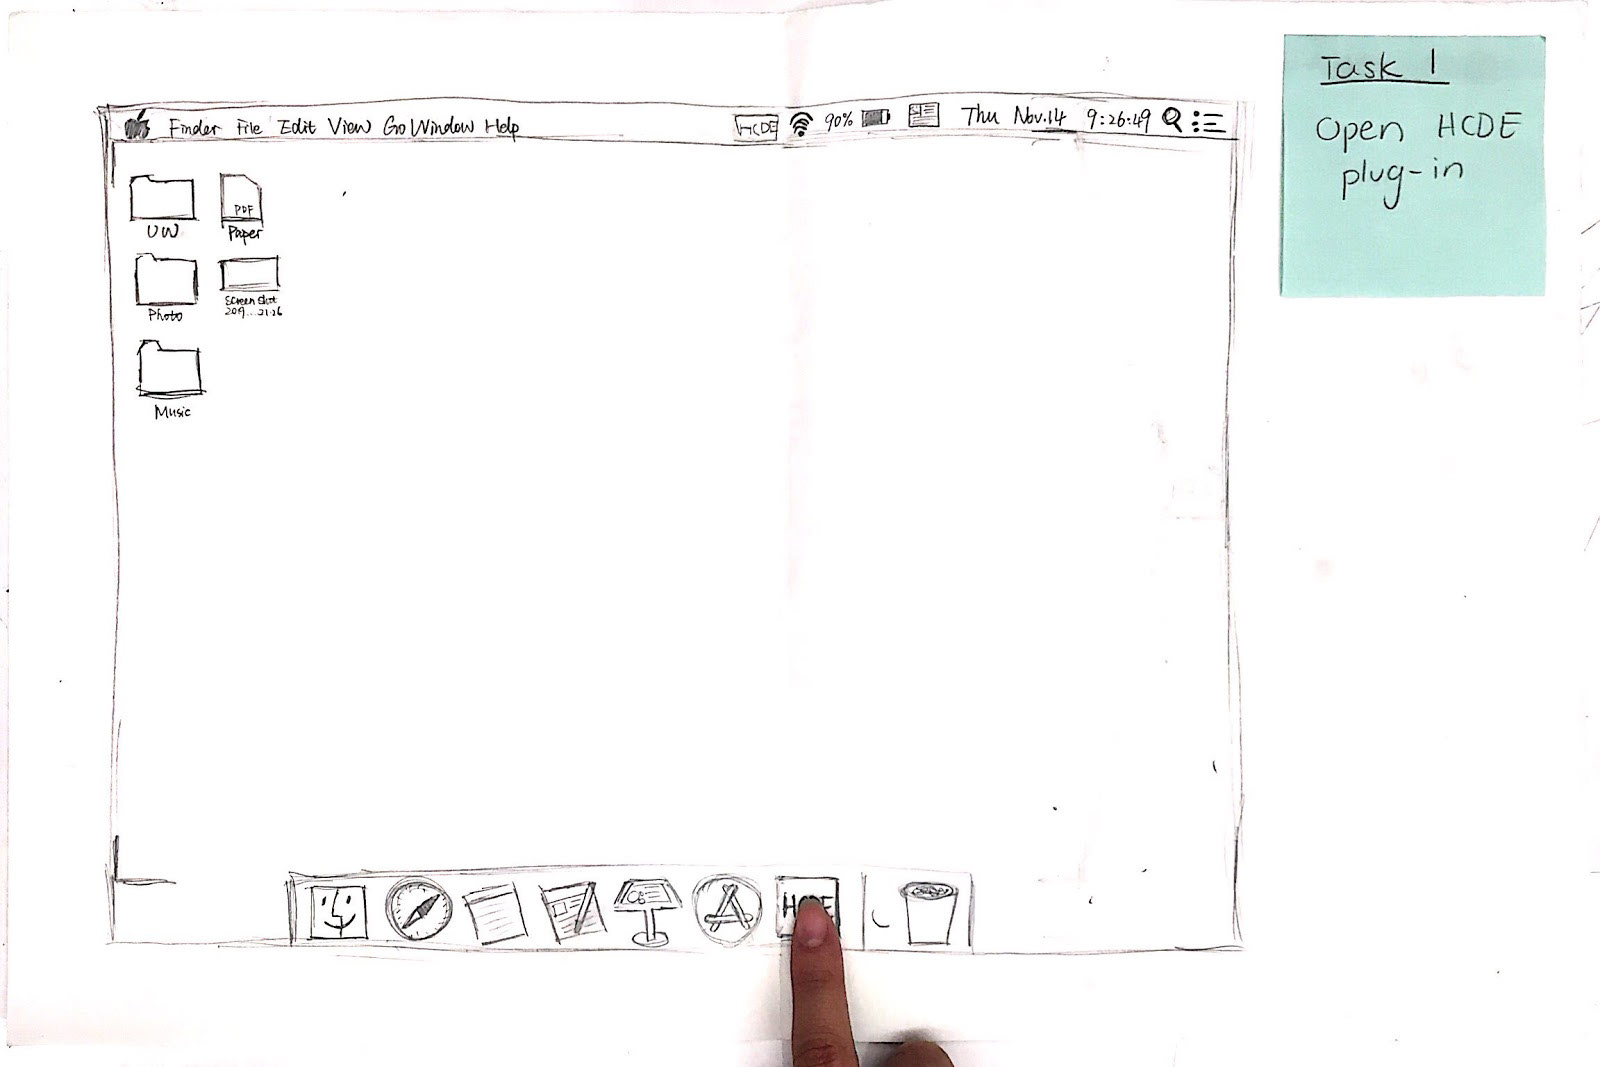
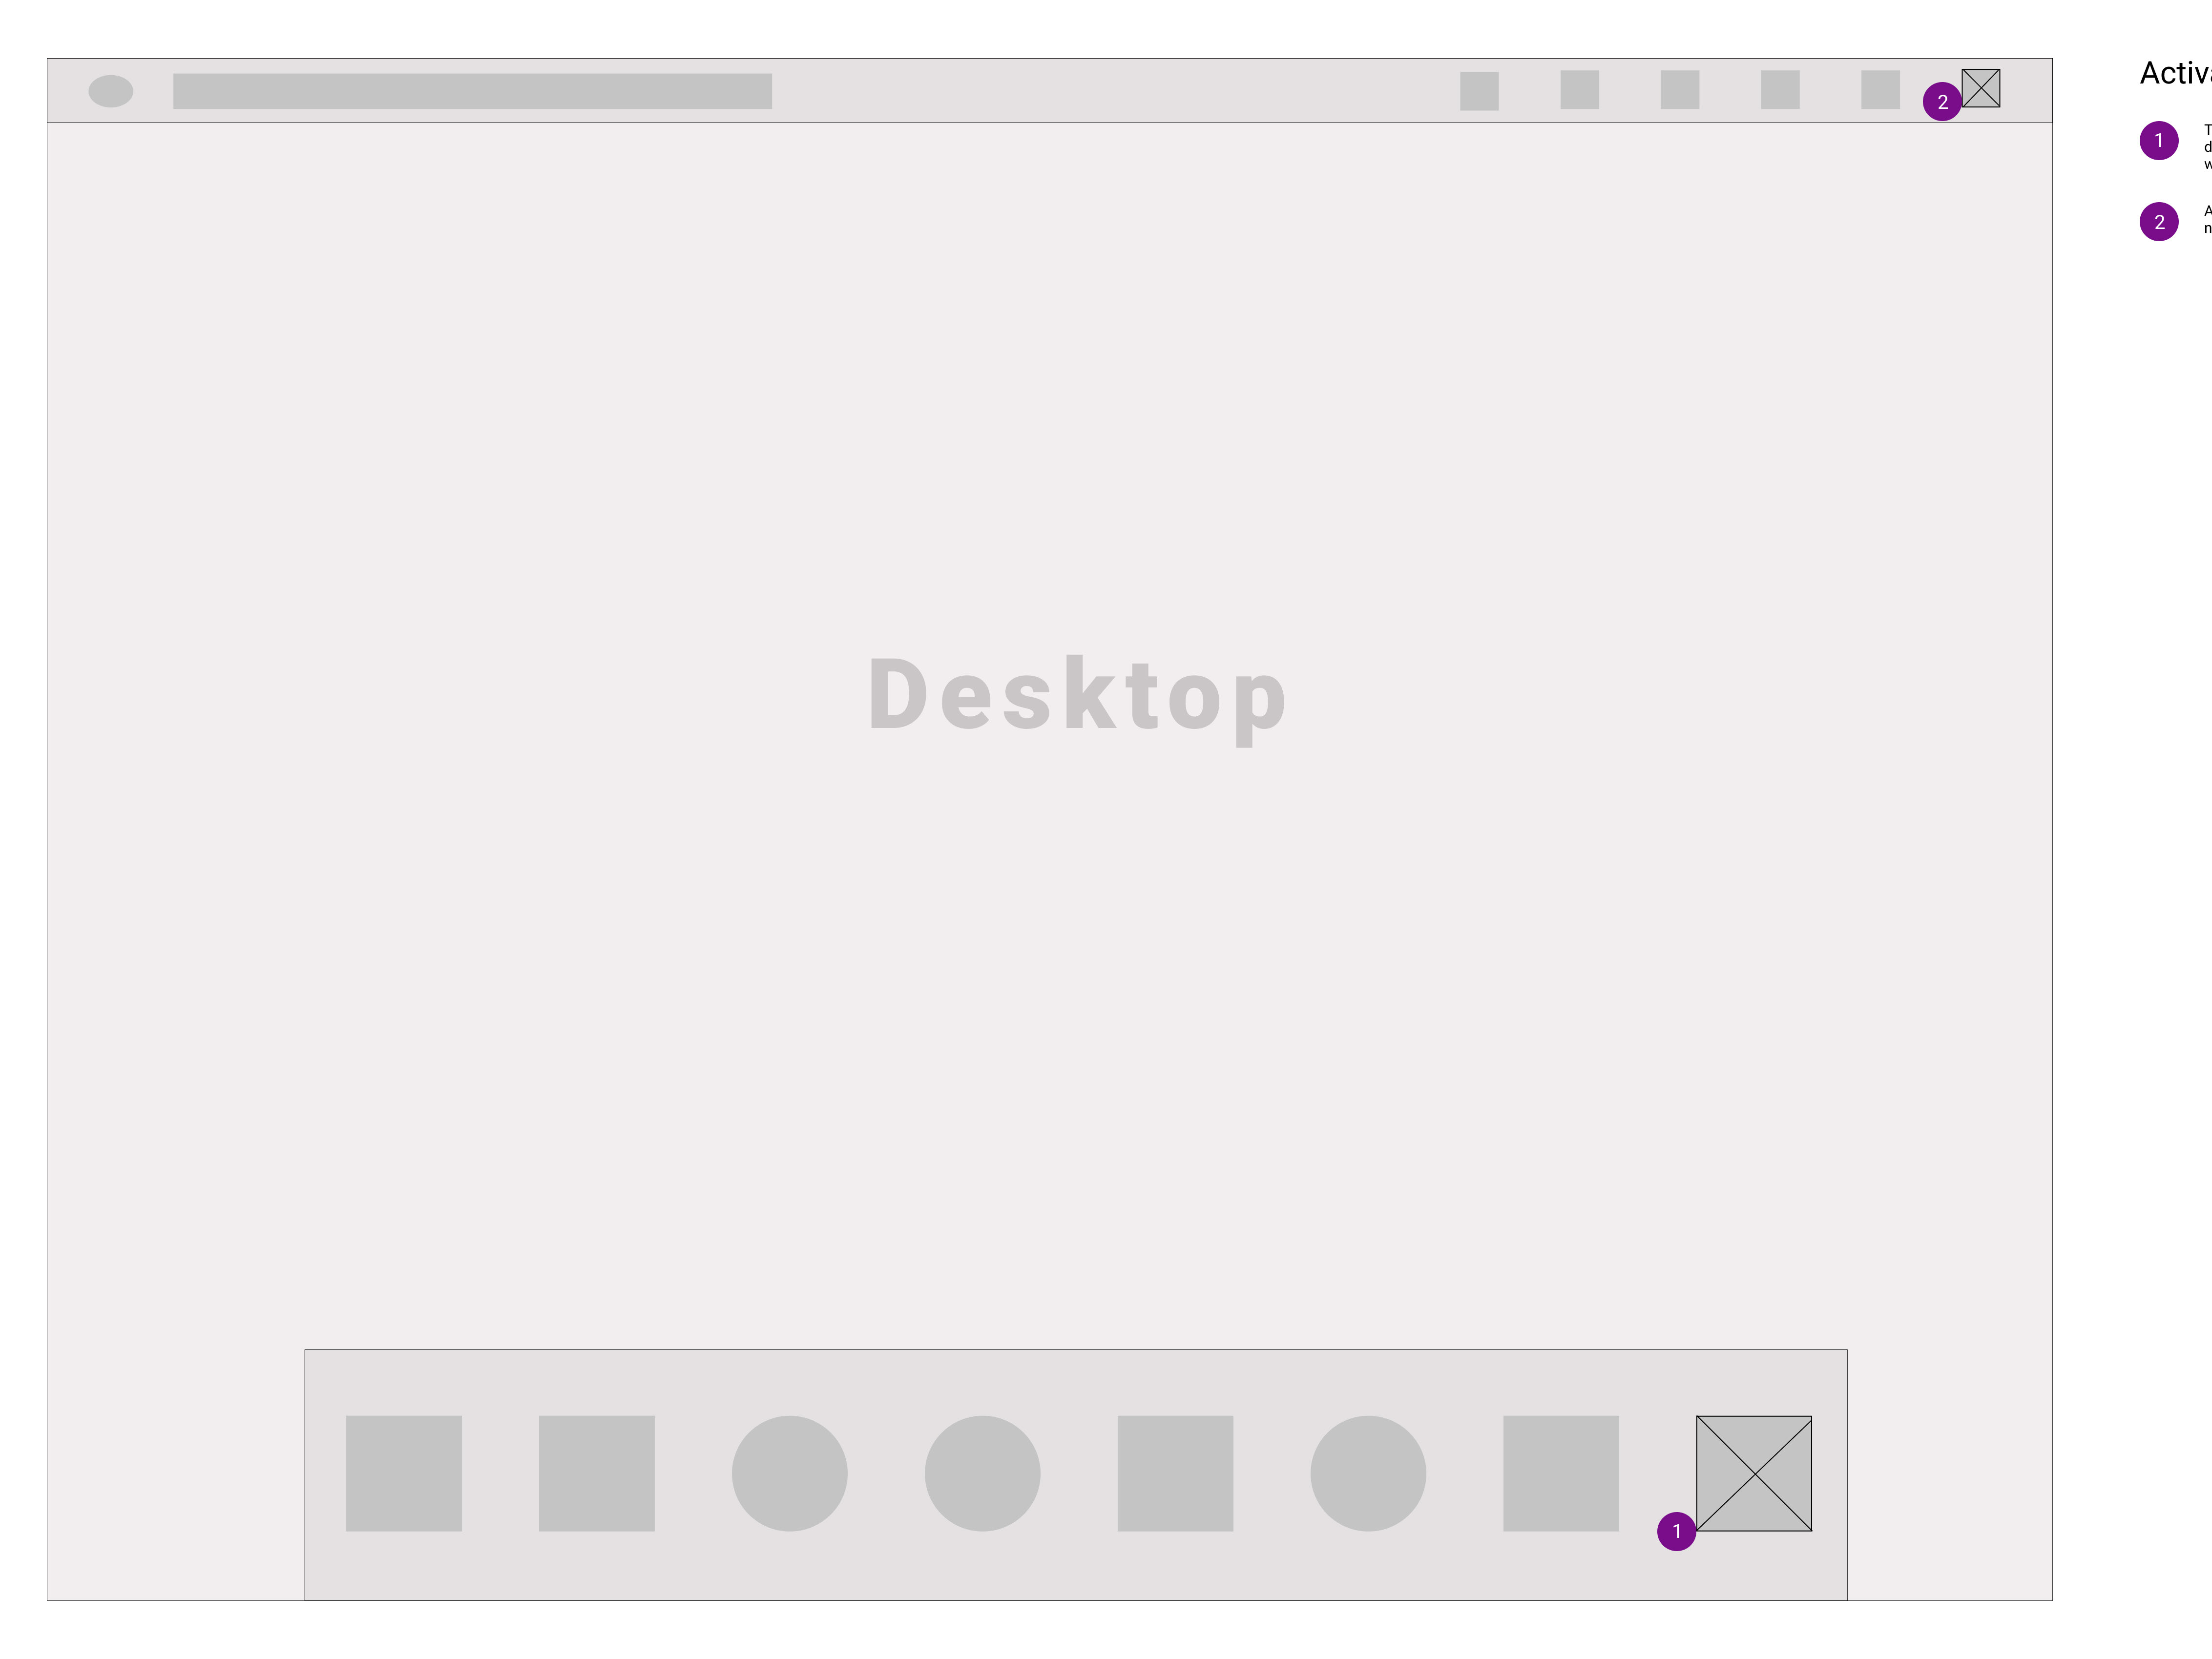
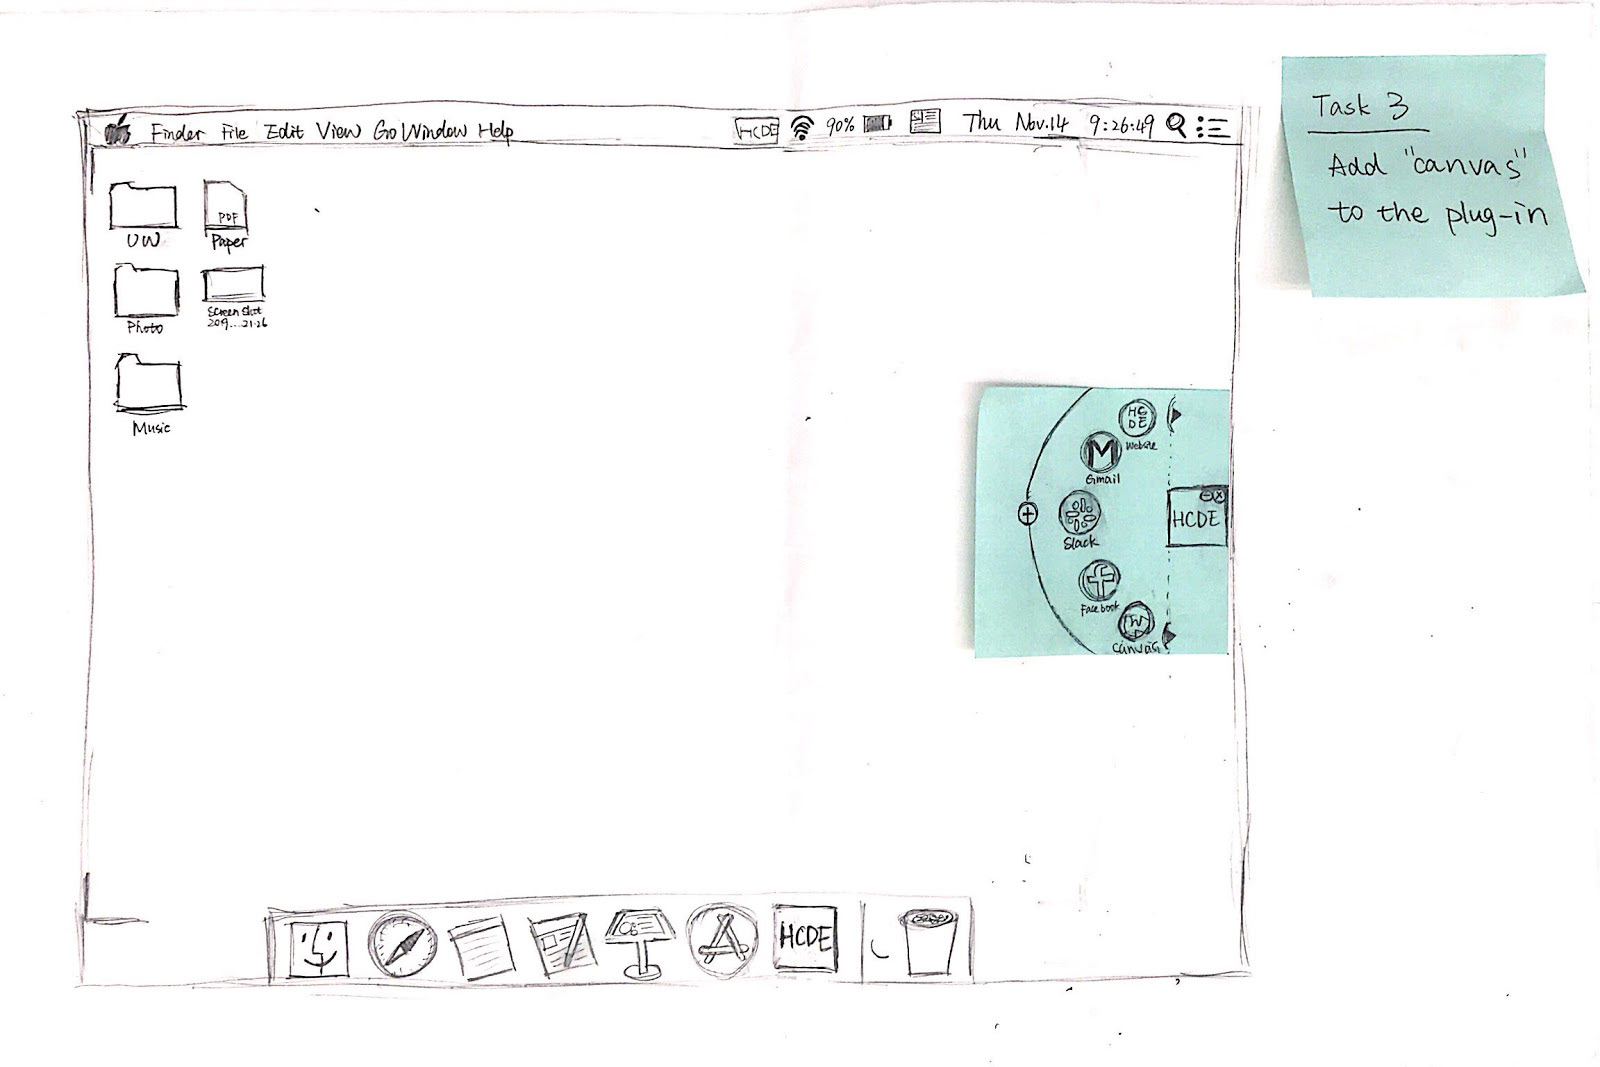
1. The users will start on their desktop or a computer folder and click on the HCDE icon to open the application.
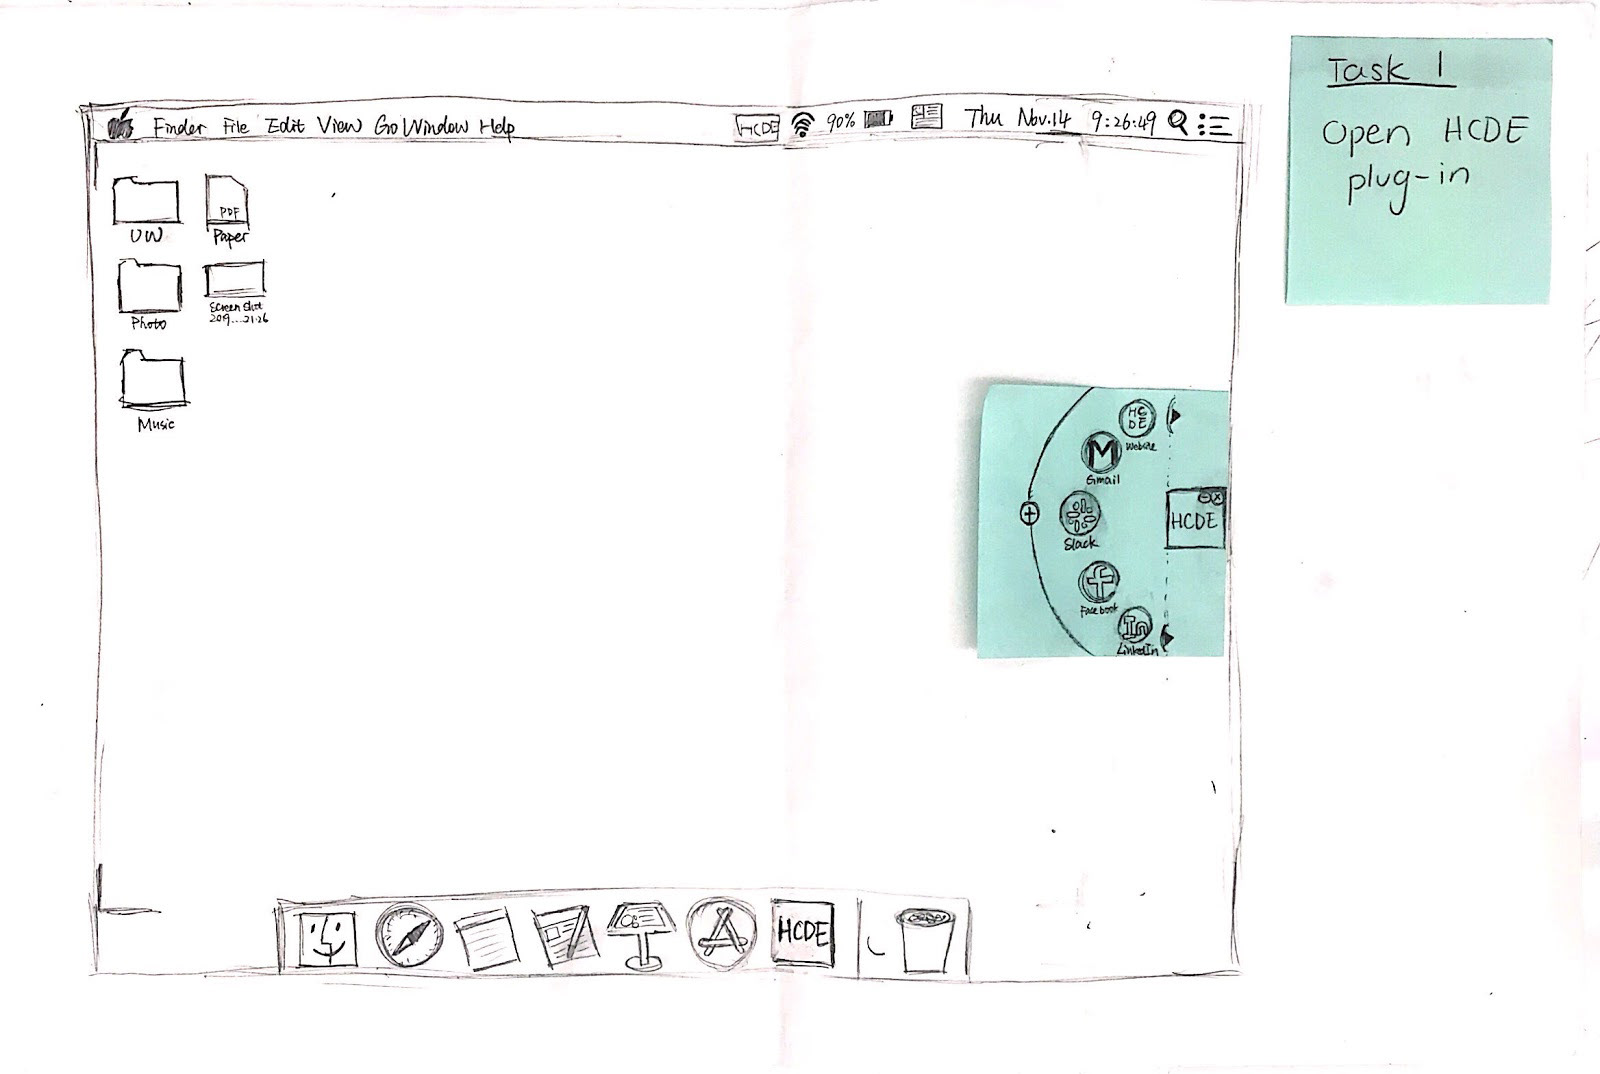
2. After clicking on the HCDE icon, the application will pop onto a side of the screen displaying a circular disk which shows the main resource icons used by the users. The users can drag the main HCDE icon to different corners of the screen; they can also drag the border of the circular dash to enlarge or reduce its size. There are five default resource icons displayed on the circular dash; the users can further edit and rearrange what to be displayed.
Task 2 Walkthrough: Choose an Icon to Open and Close
Goal: To fully understand and improve the process of using the widget
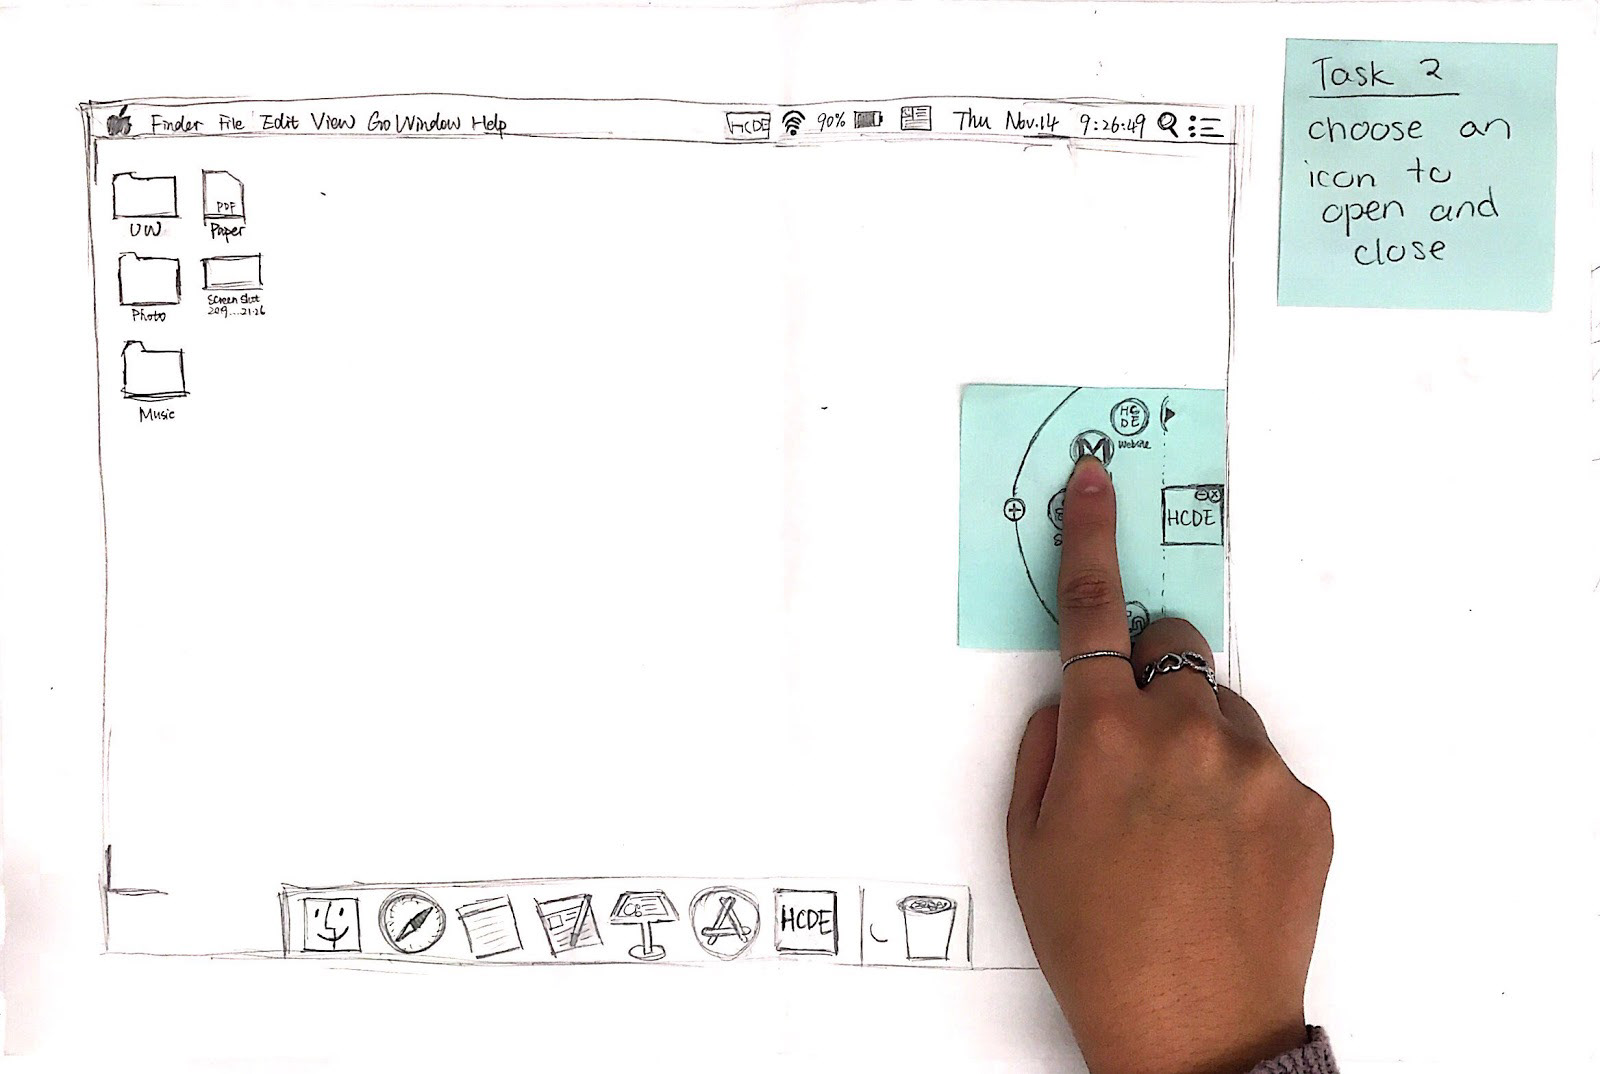
1. The users could choose the Gmail resource from the circular dash by clicking on it. A red dot will show at the top right of the resource icon, if there is an update of information from that resource.
2. Once the users click on the resource icon, the resource will be either displayed in a web browser or activated on its own application. In either case, only HCDE-related information will be shown as the default on the screen. For example, after choosing the Gmail resource, the inbox of Gmail will be pre-filtered for the users, showing only emails with the keyword “HCDE.”

3. The users can close the window of the web browser or the application to complete the second part of Task 2.
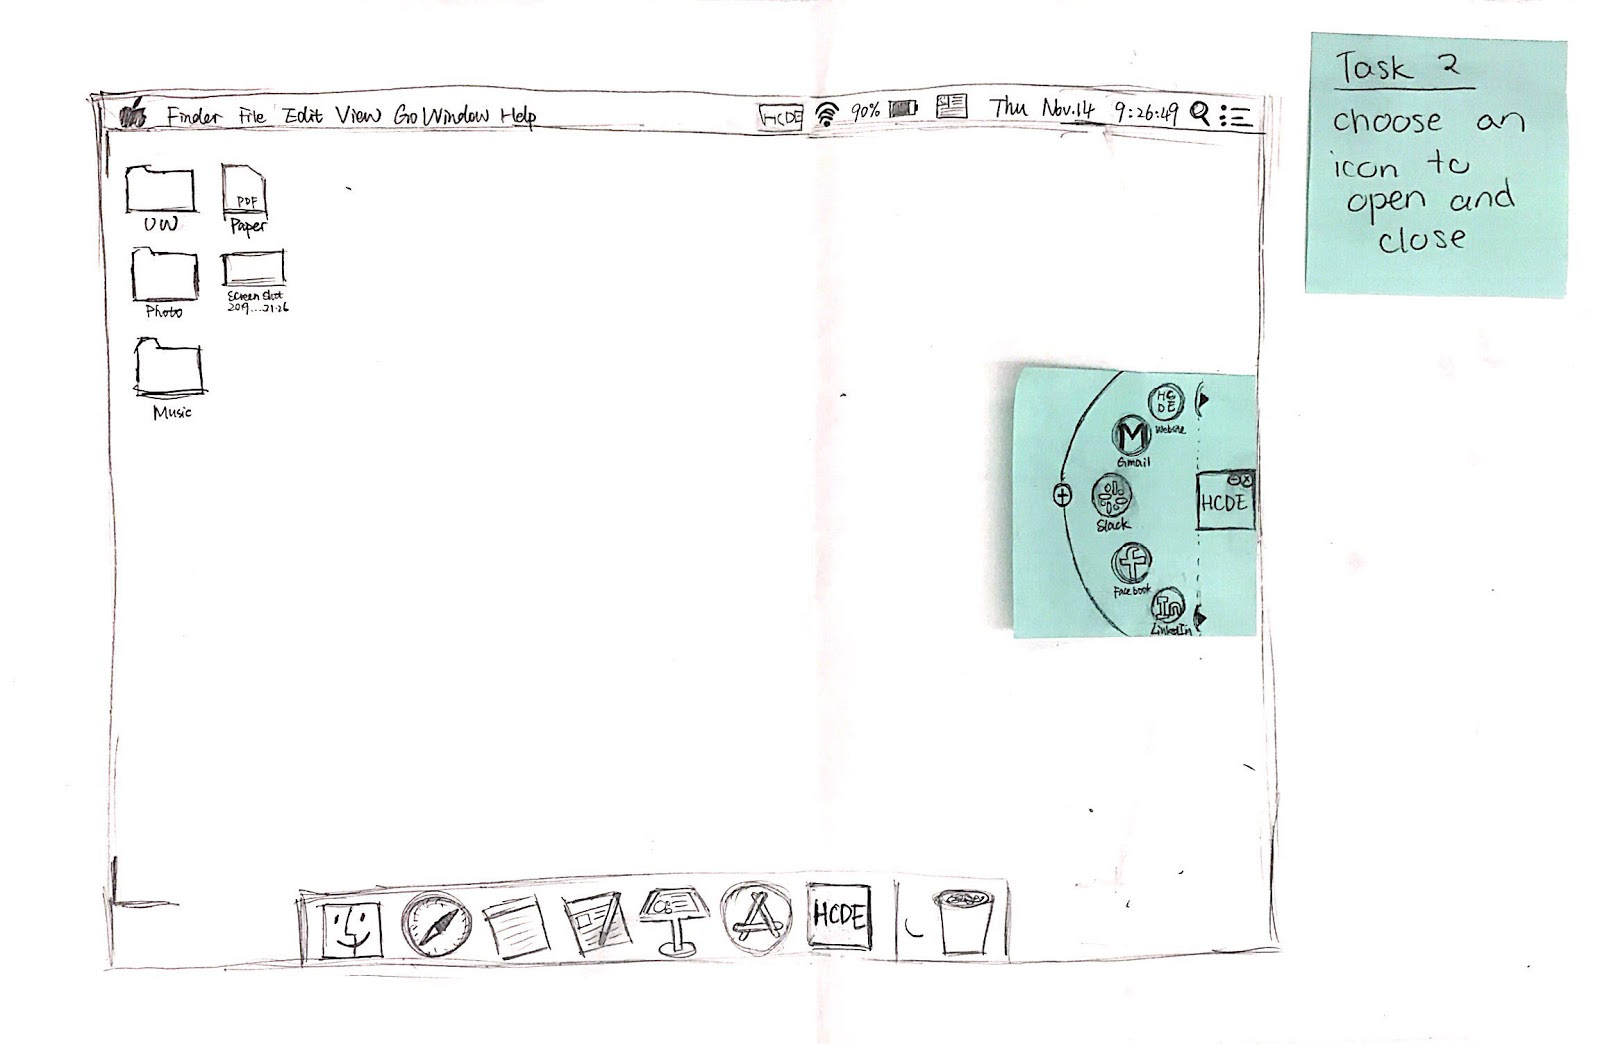
4. After exiting the Gmail resource, the users can continue to access other resources in the HCDE application. They can hide the HCDE icon from the screen by clicking the “minimize” CTA located on the top right of the icon itself; they can also deactivate the HCDE application by clicking the “close” CTA next to the “minimize” option.
Task 3 Walkthrough: Add "Canvas" to the Plug in
Goal: To understand and better develop the shortcut implementation process
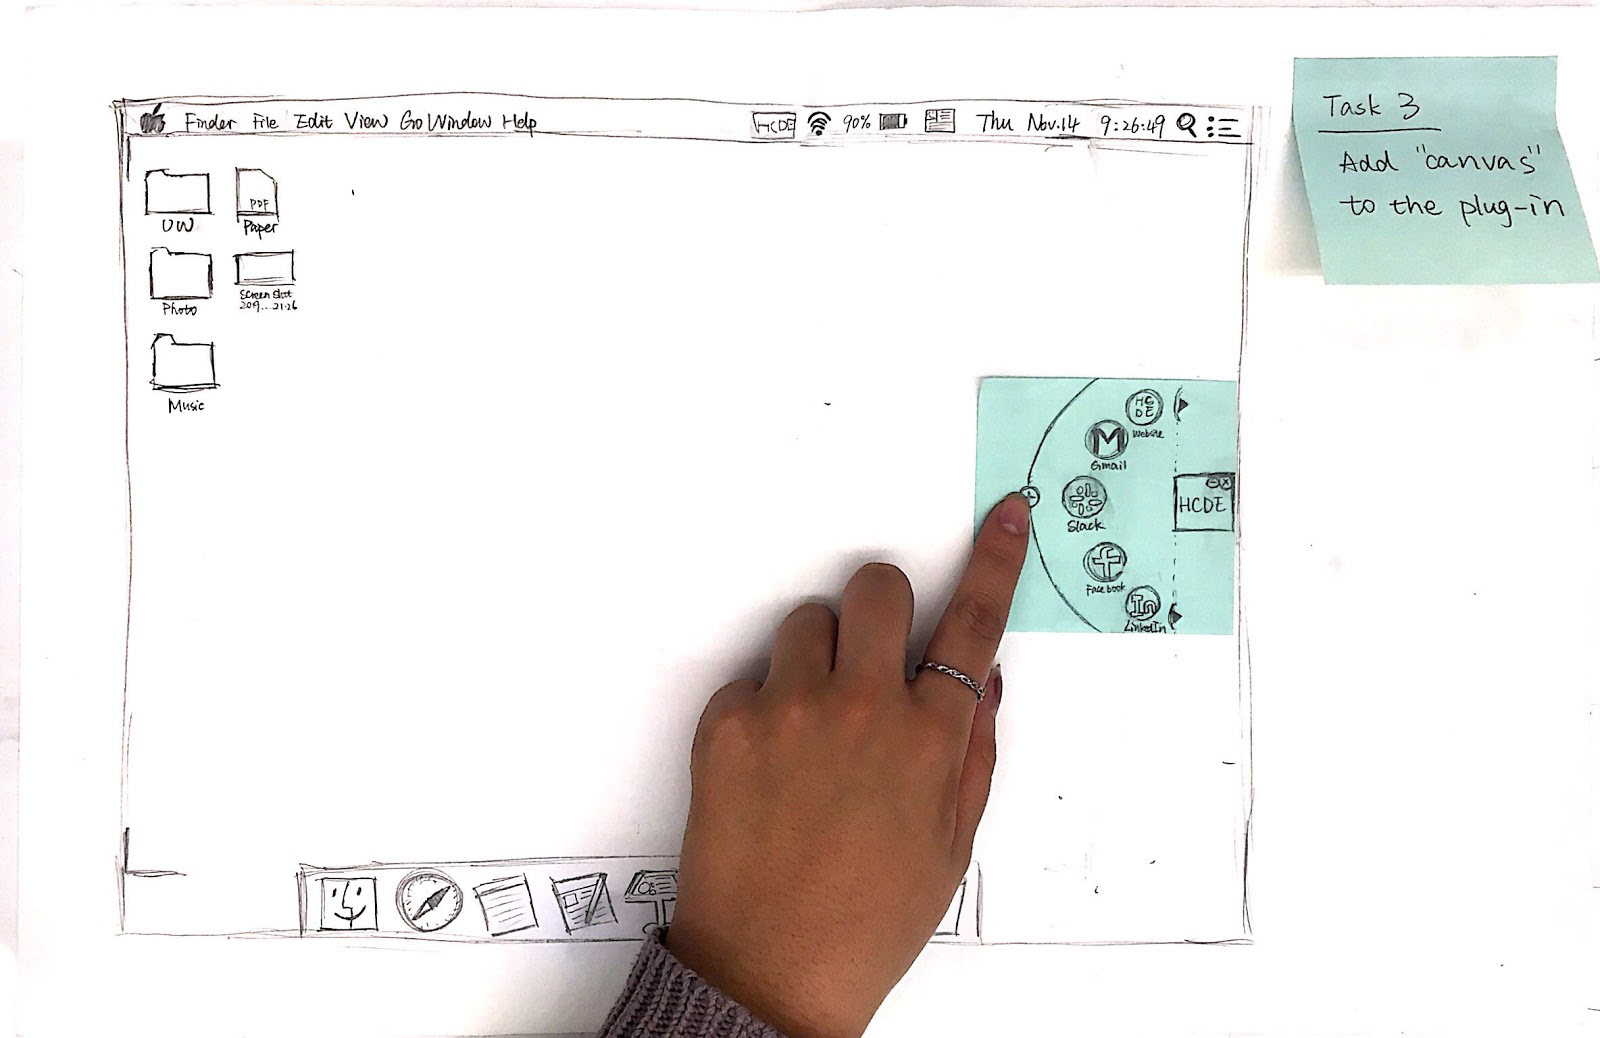
1. To begin the process of adding an additional resource to the HCDE application, the users will have to click the plus button on the side of the circular dash.
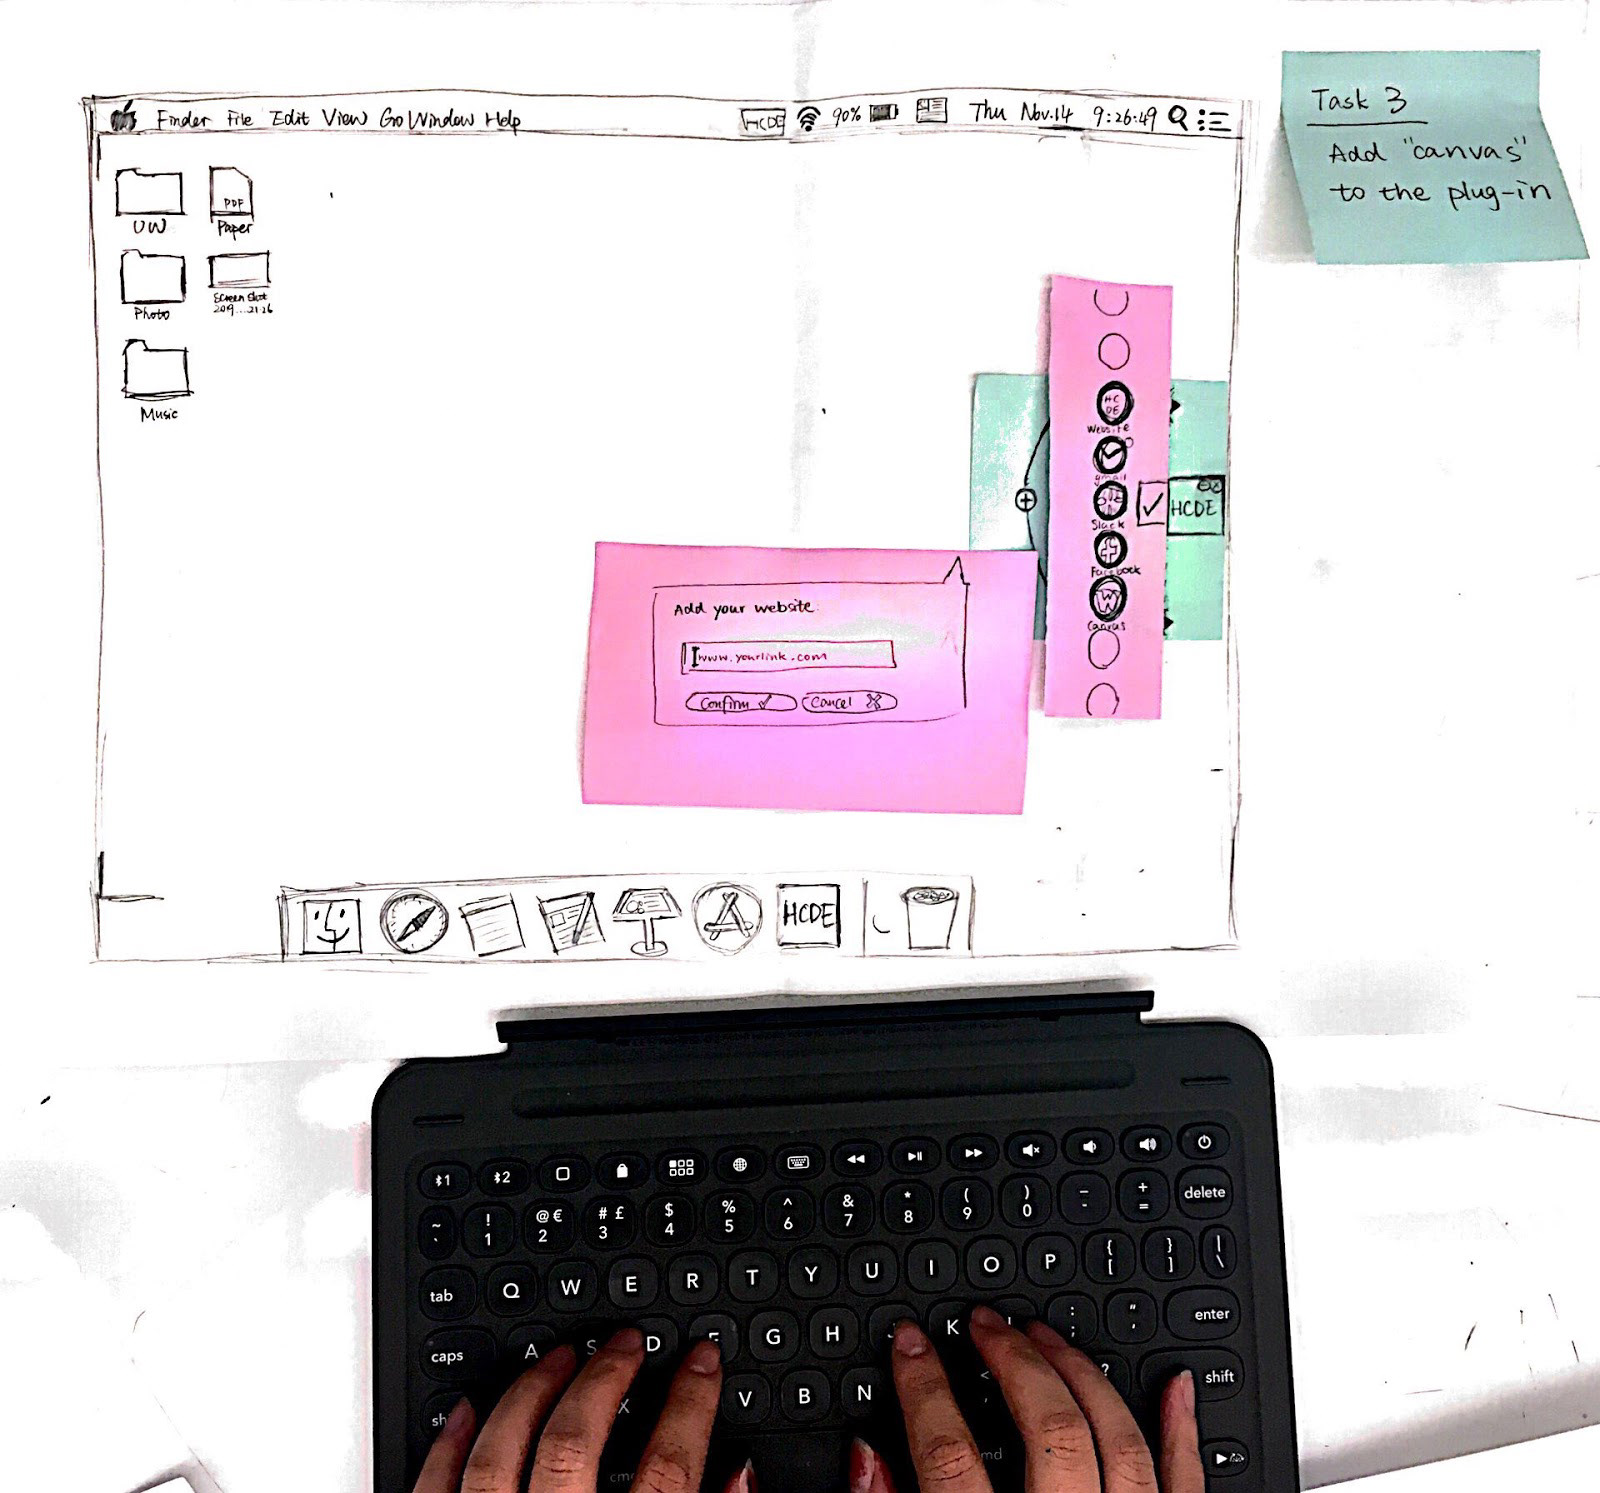
2. Once hitting the plus button, the users will enter the editing mode. A window will pop up below the button asking for a website url. At the same time, the circular dash will expand to a linear display, with all the resource icons jiggling on the spots. The five main resources will be highlighted with thicker borders. In this editing mode, users can add a resource by either 1) typing or pasting a website url if the resource is on a web page, or 2) dragging the application alias from the desktop or the direct location from a file folder if the resource is an application.
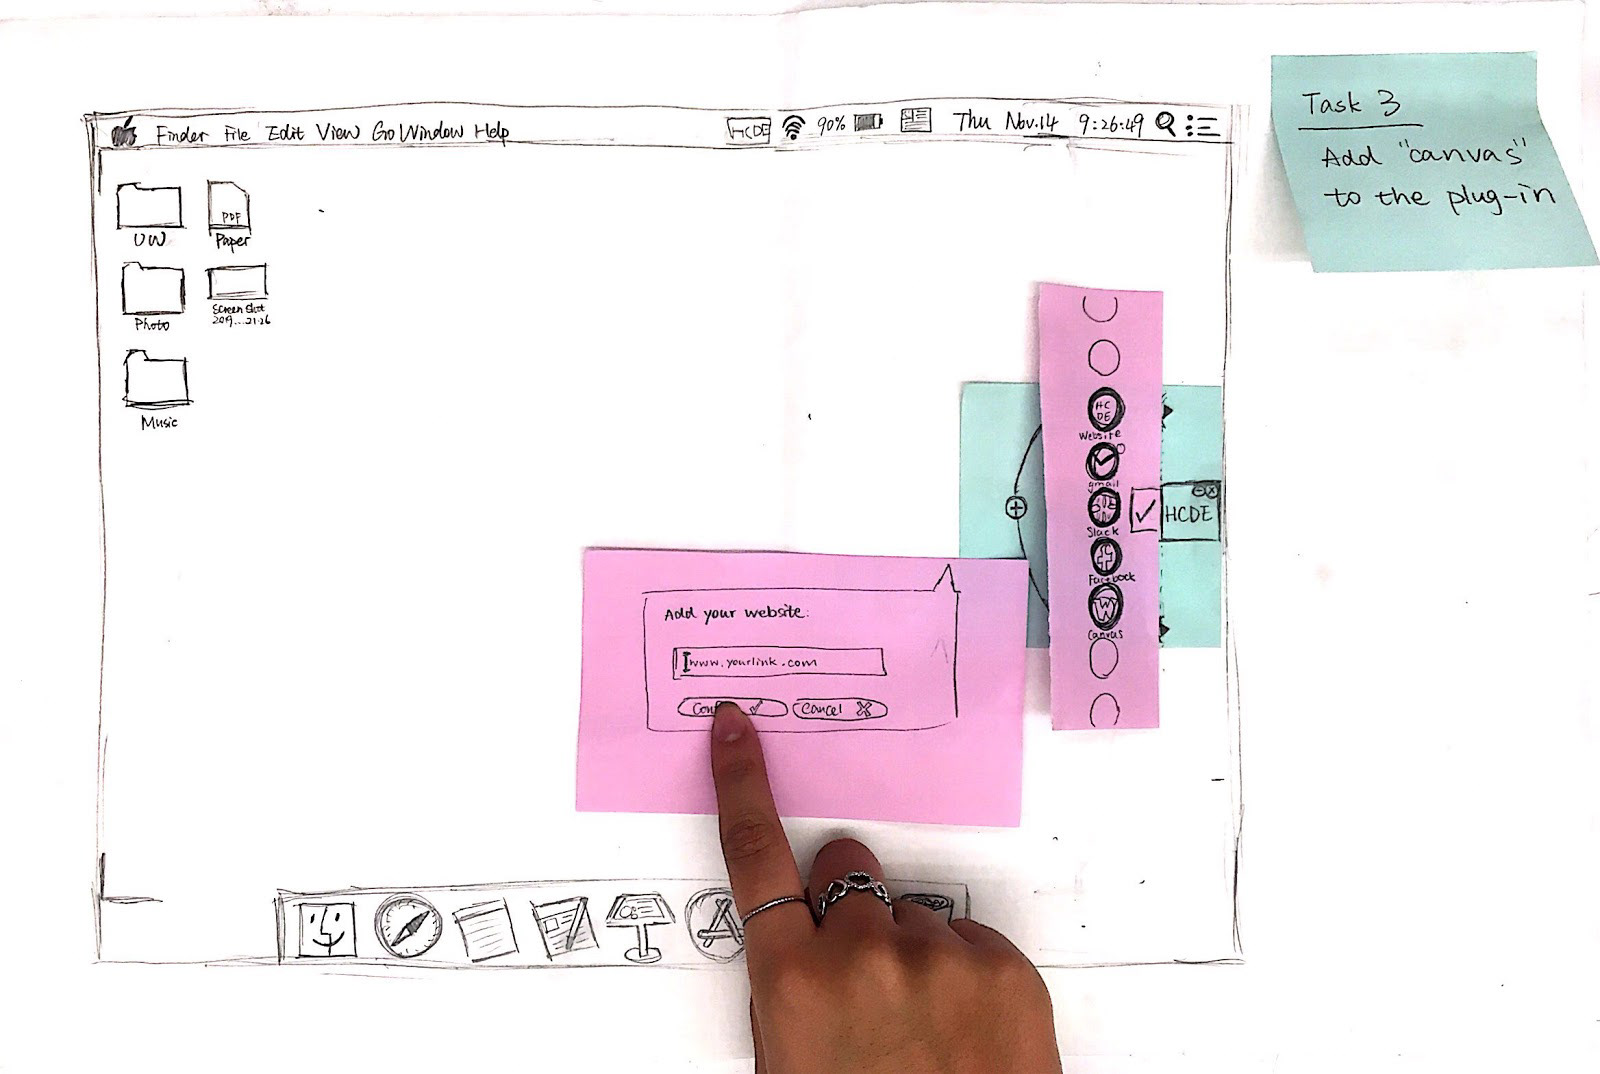
3. Once the users finish typing a url in the pop-up window, they can click the “confirm” button to add the corresponding resource to the dash or the “cancel” button to close the pop-up window. If a new resource is added, it will be placed on the top of the five main icons. The users can reorder the resource icons from the dash by dragging them over each other; they can also delete a resource icon from the dash by dragging it out of the dash range.
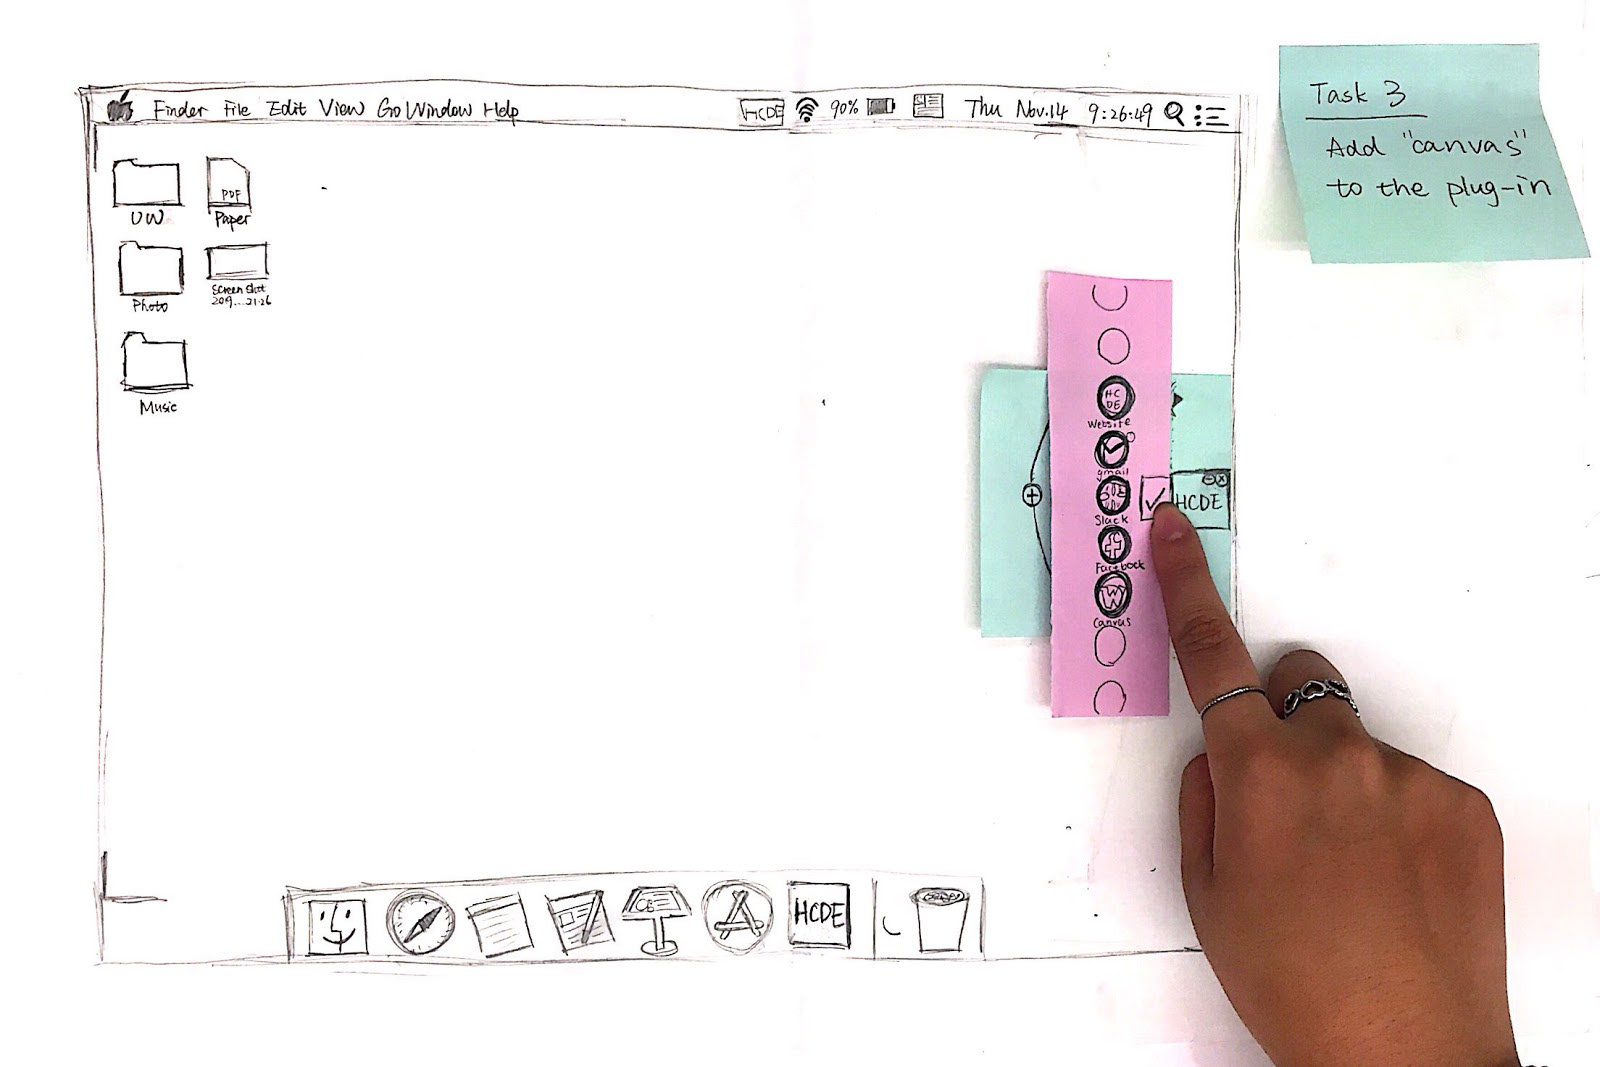
4. To confirm the changes and/or leave the editing mode, the users will have to click the check button besides the main HCDE icon.
5. Now the users can see the new order of the main resources on the HCDE application.